Planning Your Accessible Bathroom: Before You Start
So, you're thinking about making your bathroom more accessible? That's a smart move. It's not just about meeting a specific need, you know; it's really about comfort, safety, and being able to stay in your own home longer. Before you even think about picking up a hammer, there are some really important things you need to sort out.
First off, what exactly are the specific needs here? Is it for someone who uses a wheelchair, a walker, or do they just need a bit more stability? This one question pretty much dictates everything else, from how wide your doors need to be to where you'll put grab bars. For example, a wheelchair needs a clear path that's 30 inches wide just to turn around, which often means you're looking at a 60-inch diameter of clear floor space. That's a big deal in many West Hills homes, especially those older ranch styles where bathrooms certainly weren't built with this kind of thing in mind.
Next, let's talk budget. This isn't just about the fancy new fixtures; it's also about any potential structural changes. Widening a doorway, for instance, isn't just a simple swap. You might be dealing with load-bearing walls, electrical wiring, and plumbing lines. That's where costs can really shoot up.
Then, do your homework. Check out ADA guidelines – even if you're not building a public space, they offer an excellent baseline for residential accessibility. You'll learn about things like the right toilet height, what kind of shower seat you might need, and different faucet types. I always tell people to spend more time planning than they think they need. Trust me, it saves you a lot of headaches and money down the road.
During the Project: DIY vs. Calling a Pro
Okay, so you've got your plan. Now, what can you actually do yourself, and when should you just pick up the phone and call someone like me at Midway Bathroom & Kitchen?
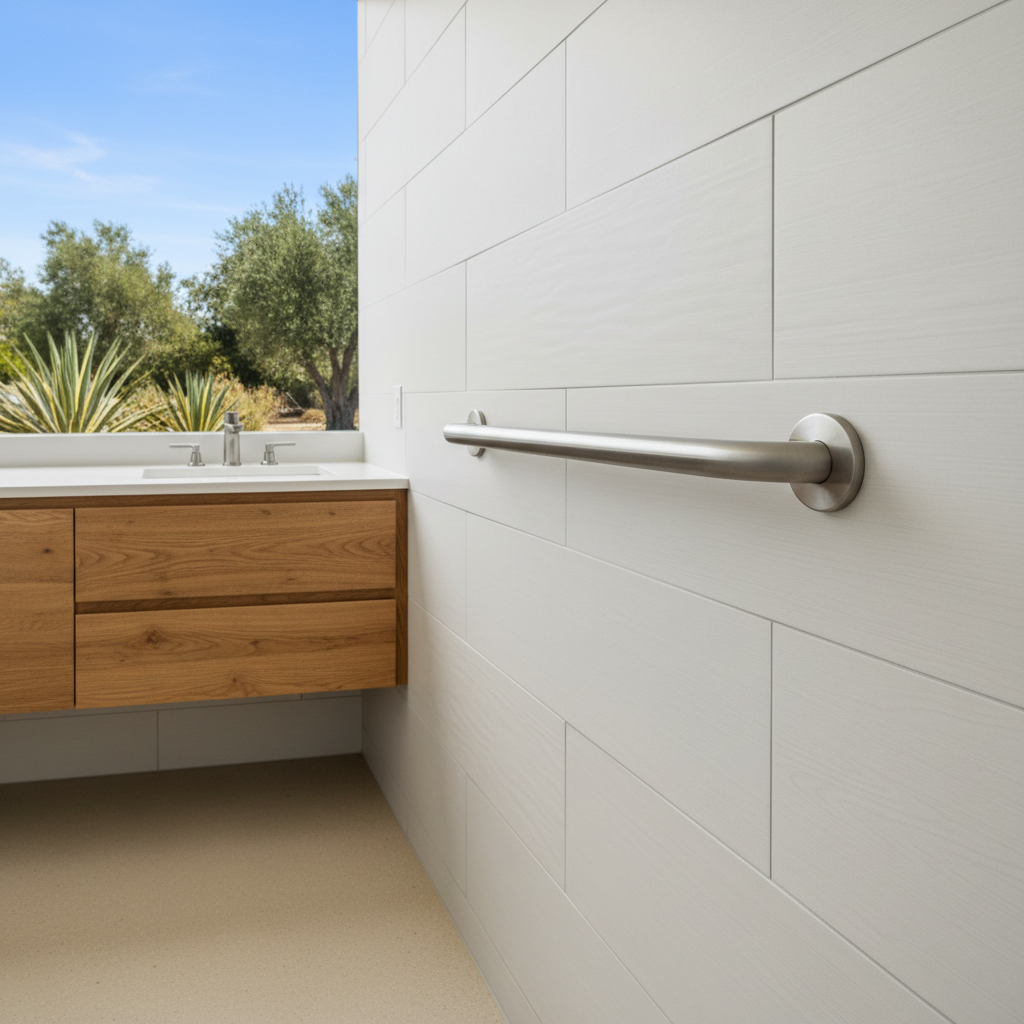
Things You Might Do Yourself:
- Grab Bars: If you're pretty handy and know how to find studs, installing grab bars can be a DIY job. Just make sure they're anchored properly into blocking or studs, not just drywall. A loose grab bar is definitely worse than not having one at all.
- Raised Toilet Seats: These are usually super straightforward to install. They just replace your existing seat, no biggie.
- Non-Slip Mats/Strips: Easy to apply in the shower or tub. A quick win for safety, right?
- Lever Handle Faucets: Swapping out those old knob handles for lever ones is often a simple plumbing task if you're comfortable with basic tools and, of course, turning off the water.
When to Call a Pro (Seriously, don't mess with these):
- Widening Doorways: Like I said, this often means structural work, electrical, and maybe even plumbing. You need permits, and you absolutely need someone who knows what they're doing.
- Roll-In Showers: This is a major renovation. It involves re-sloping the floor, waterproofing everything, moving drains, and often relocating plumbing. If it's not done right, you're looking at leaks and some serious water damage. Plus, you need to think about the type of subfloor – some of the older homes around here have foundations that require specific approaches.
- Lowering Sinks/Countertops: This isn't just about cutting down a cabinet. It involves adjusting the plumbing for drain lines and water supply, and often means custom cabinetry.
- Any Electrical Work: Adding new outlets, moving switches, or installing specialized lighting near water is always, always a job for a licensed electrician. Period.
- Major Plumbing Reroutes: If you're moving a toilet or shower significantly, that's pro territory. You really don't want to deal with burst pipes or improper drainage.
Even if you plan on doing some of the smaller things yourself, I'd still recommend having a professional come in for a consultation. We can spot potential issues you might miss and give you advice on the best products and placements.
After the Project: Enjoying Your Accessible Space
Once the dust settles – literally – it's time to enjoy your new, safer bathroom. But don't just walk away. Do a few checks first.
Test everything out. Are the grab bars solid? Does the shower drain properly? Is the toilet height comfortable? Try walking through the space as if you were the person with the accessibility need. Navigate with a cane or walker if that's relevant. Sometimes, a small adjustment after the fact can make a huge difference in daily use, don't you think?
Keep up with maintenance, just like any other part of your home. Check those grab bar screws every now and then. Make sure non-slip surfaces are still doing their job. If you've got a new roll-in shower, keep an eye on the grout and sealant, especially with our West Hills hard water. A little preventive care really goes a long way in keeping the space safe and functional for years to come.
An accessible bathroom isn't just a renovation; it's an investment in comfort and independence. It's a space that truly serves the people who use it, and that's something worth doing right.